The 'Groups' page gives you an overview of all the groups in your portal.
Courses and learning paths are always linked to groups, not directly to individual users.
This structure allows you to:
-
Add the same user to multiple groups.
-
Roll out training courses per group.
-
Manage users, courses, and environments efficiently.
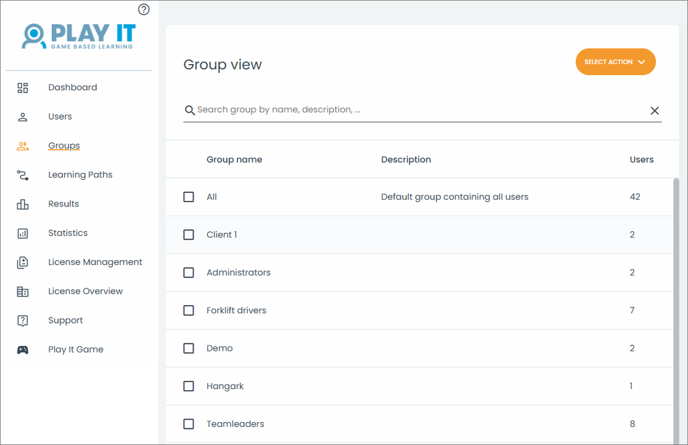
The ‘All’ group
The ‘All’ group is the only default group in the portal.
-
It automatically contains all users in your organization.
-
It cannot be deleted.
The ‘Select Action’ button
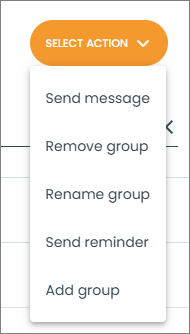
The ‘Select Action’ button is your main tool for managing groups.
From here, you can perform several actions depending on the group you’ve selected.
| Action | Description |
|---|---|
| Add group | Create a new group. You can specify the group name and add a description. |
| Rename group | Change the name of the selected group. |
| Remove group | Delete the selected group from the portal (except the default All group). |
| Send message | Send a custom message to all users in the selected group. You’ll be asked to enter a subject and message body. |
| Send reminder | Send reminders to all users in the selected group. Each user receives a personalized message depending on their course progress or activation status. |
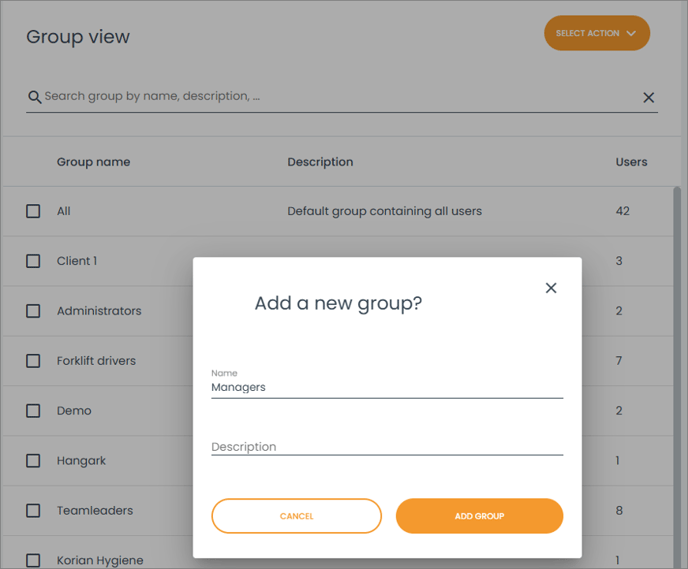
Add a new group
-
In the Group view, click the ‘Select Action’ button.
-
Choose ‘Add group’.
-
In the pop-up, enter a group name and optional description.
-
Click Add Group to create it.
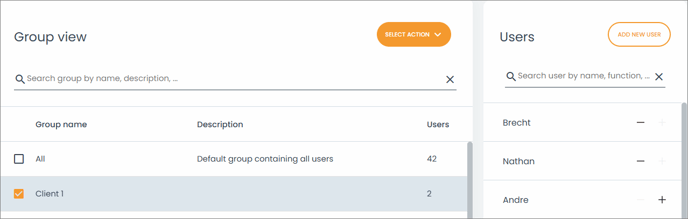
Add users to a group
-
In the Group view, select the group where you want to add a user.
-
Once selected, the User view will update, and a ‘+’ sign will appear.
-
Click the ‘+’ to add the user to the selected group.
-
A pop-up will appear asking for confirmation.
-
Click Add to confirm.
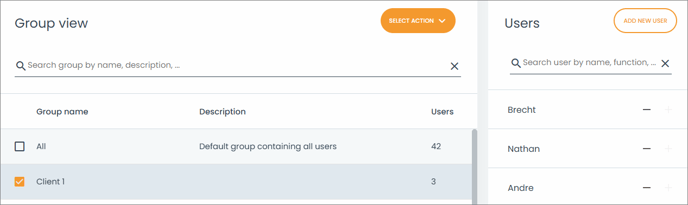
Remove users from a group
-
In the Group view, select the group where you want to remove a user.
-
The User view will update, and a ‘–’ sign will appear.
-
Click the ‘–’ to remove the user from the selected group.
-
Confirm the removal in the pop-up by clicking Remove.
Rename a group
-
In the Group view, select the group you want to rename.
-
Click the ‘Select Action’ button and choose ‘Rename group’.
-
Enter the new name in the pop-up.
-
Confirm by clicking Rename Group.
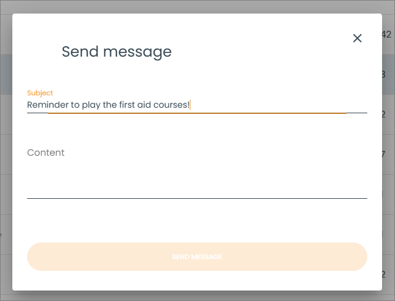
Send a message to a group
-
In the Group view, select the group you want to message.
-
Click the ‘Select Action’ button and choose ‘Send message’.
-
In the pop-up, enter a subject and message for all users in that group.
-
Click Send message to send it.
Send reminders to a group
-
In the Group view, select the group you want to remind.
-
Click the ‘Select Action’ button and choose ‘Send reminder’.
-
A pop-up will show an overview of the reminders to be sent.
-
Click OK to confirm.
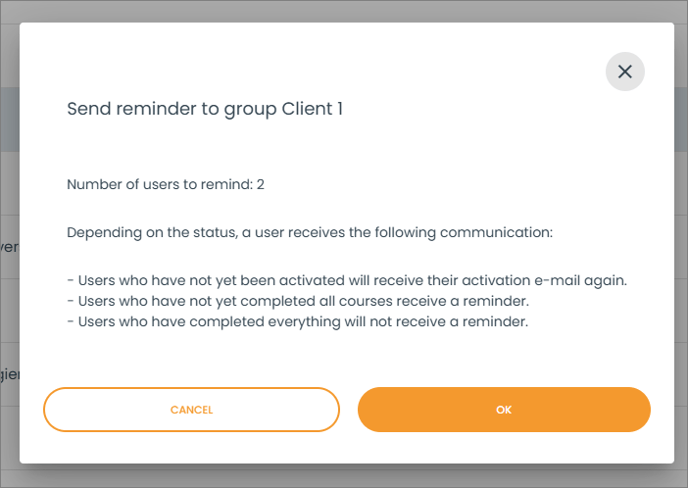
Depending on the user’s status, the reminder works as follows:
-
Users not yet activated receive their activation email again.
-
Users in progress receive a personalized reminder for unfinished courses.
-
Users who completed all courses do not receive a reminder.
Remove a group
-
In the Group view, select the group you want to remove.
-
Click the ‘Select Action’ button and choose ‘Remove group’.
-
Confirm that you want to delete the group.
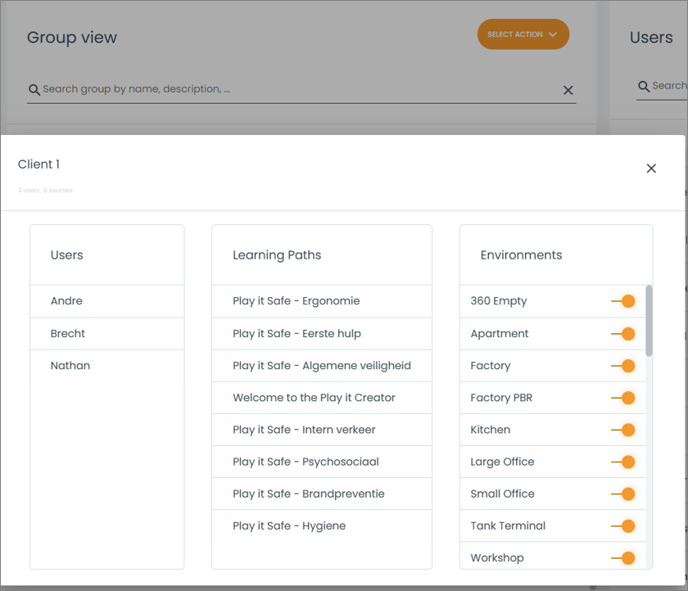
Group details
Click on a group name in the Group view to see its details.
The group details are divided into three columns:
-
Users – all users currently in the selected group.
-
Courses – all courses linked to the group.
-
Environments – all environments connected to the group.
You can activate or deactivate an environment by using the slider next to it.