You can manage the users via the 'Users' page.
On this page in the center you have the 'User view' and on the right you have 'Groups'

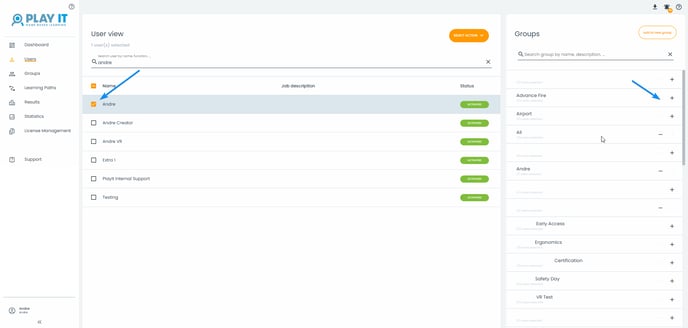
- USER VIEW
Here you find an overview of all users. These are listed alphabetically arranged and contain 3 columns: Name, Job description and Status.
There are currently 4 possible statuses:

Activated users have logged in at least once and have started the training. 
Accepted users have accepted the invitation, but didn't start the app yet. 
Invited users have received an invitation, but didn't accept it yet. 
Users with the status 'Problem', have an issue receiving the invitation mail. - USER DETAILS
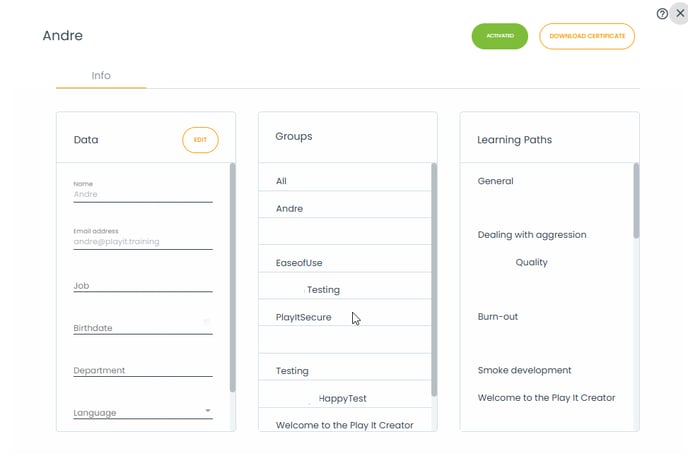
By clicking on an username in the 'User view', you get some extra user info divided in 3 columns:
Data, Groups, Courses.
On the top right, you see the current status of the user and you can download the course certificates by using the 'Download certificate' button.
By using the 'Edit' button you can change the personal info, the preferred language and the role of the user.- Data: Here you can find and edit personal information about the user.
- Groups: Here you can easily see in what 'Groups' the user got added.
- Courses: Here you can quickly see what 'Courses' the user is able to take.
- 'SELECT ACTION'-button
On the top right, within the 'User view' you have the 'Select Action'-button.
When no users are selected in the 'User view', this button provides you with 2 possible actions:
- 'Import new users'.
- 'Add user'.
When one or more users are selected in the 'User view', the button provides you with 2 extra possible actions:
- 'Remove Users'.
- 'Send reminder'.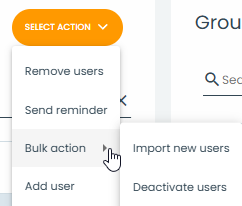
- GROUPS
On the right side of the 'Users' page, you have the 'Groups' column.
This column can only be used when you select one or more users in the 'User view'.
It enables a quick way of adding or removing the selected users to an existing group by clicking on '+' or '-'.
If you want to add the selected users to a new group, you can instantly create the group by clicking on 'Add to new group'.